Note
Access to this page requires authorization. You can try signing in or changing directories.
Access to this page requires authorization. You can try changing directories.
In this quickstart, you learn how to create and deploy a FHIR service instance via the Azure portal. The Azure portal provides a web interface with guided workflows, making it an efficient tool for deploying the FHIR® service.
Prerequisites
An Azure subscription. If you don't have an Azure account, create a free account before you begin.
An Azure Health Data Services workspace. To create and deploy a workspace, see Deploy workspace in the Azure portal.
Create and deploy a new FHIR service
Go to your Azure Health Data Services workspace resource.
On the menu, select Services > FHIR service.
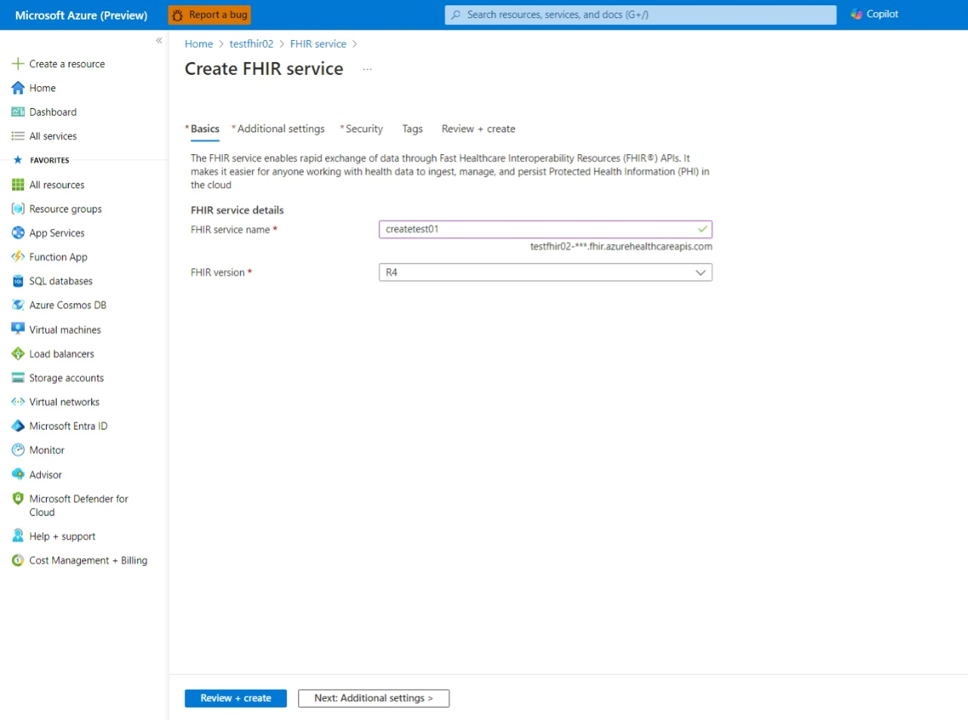
Select + Add FHIR service.
Basics tab: Give the FHIR service a friendly and unique name. Select the FHIR version (STU3 or R4), and then choose Next: Additional settings.
Additional settings tab (optional): This tab allows you to:
View authentication settings: The default configuration for the FHIR service is Use Azure RBAC for assigning data plane roles. When configured in this mode, the authority for the FHIR service is set to the Microsoft Entra tenant for the subscription.
Integration with non-Microsoft Entra ID (optional): Use this option when you need to configure up to two more identity providers other than Microsoft Entra ID to authenticate and access FHIR resources with SMART on FHIR scopes.
Setting versioning policy (optional): The versioning policy controls the history setting for FHIR service at the system level or individual resource type level. For more information, see FHIR versioning policy and history management. Choose Next: Security.
On the Security settings tab, review the fields.
By default, data is encrypted with Microsoft-managed keys. For more control over encryption keys, you can supply customer-managed keys to use for encryption of data. Customer-managed keys must be stored in an Azure Key Vault. You can either create your own keys and store them in a key vault, or use the Azure Key Vault APIs to generate keys. For more information, see Configure customer-managed keys for the FHIR service. Choose Next: Tags.
On the Tags tab (optional), enter any tags.
Tags are name and value pairs used for categorizing resources and aren't required. For more information, see Use tags to organize your Azure resources and management hierarchy.
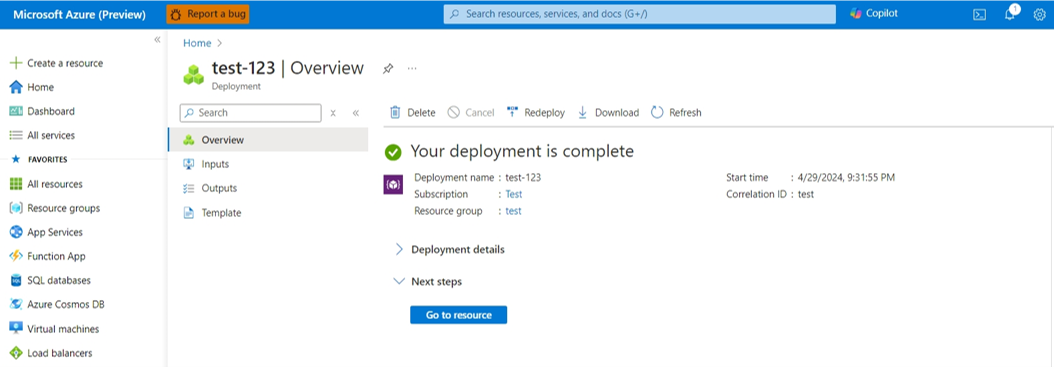
Choose Review + Create to begin the validation process. Wait until you receive confirmation that the deployment completed successfully. Review the confirmation screen, and then choose Create to begin the deployment.
The deployment process might take several minutes. When the deployment completes, you see a confirmation message.


Validate the deployment
From the deployment confirmation page, select Go to resource Copy the FHIR metadata endpoint and paste in a browser to fetch the capability statement from your new FHIR service.
Clean up resources
To avoid incurring costs, you can delete unneeded resources by deleting the FHIR service, or its containing workspace or resource group.
Next step
Note
FHIR® is a registered trademark of HL7 and is used with the permission of HL7.